

Ribbon Flowers!

 Supplies used: Cardstock : georgia pacific,SU Patterned: DCWV Cricut and Holiday cakes cart, ribbon buttons, brads, stickles
So how do you make these delicious flowers? Easy peasy! Here are your supplies...
Two sided tape, ribbon, circle punch or your cut your own circle, brad or button, crop-a-dial (not shown)
Step 1. Lay a piece of 2 sided tape onto your cardstock.
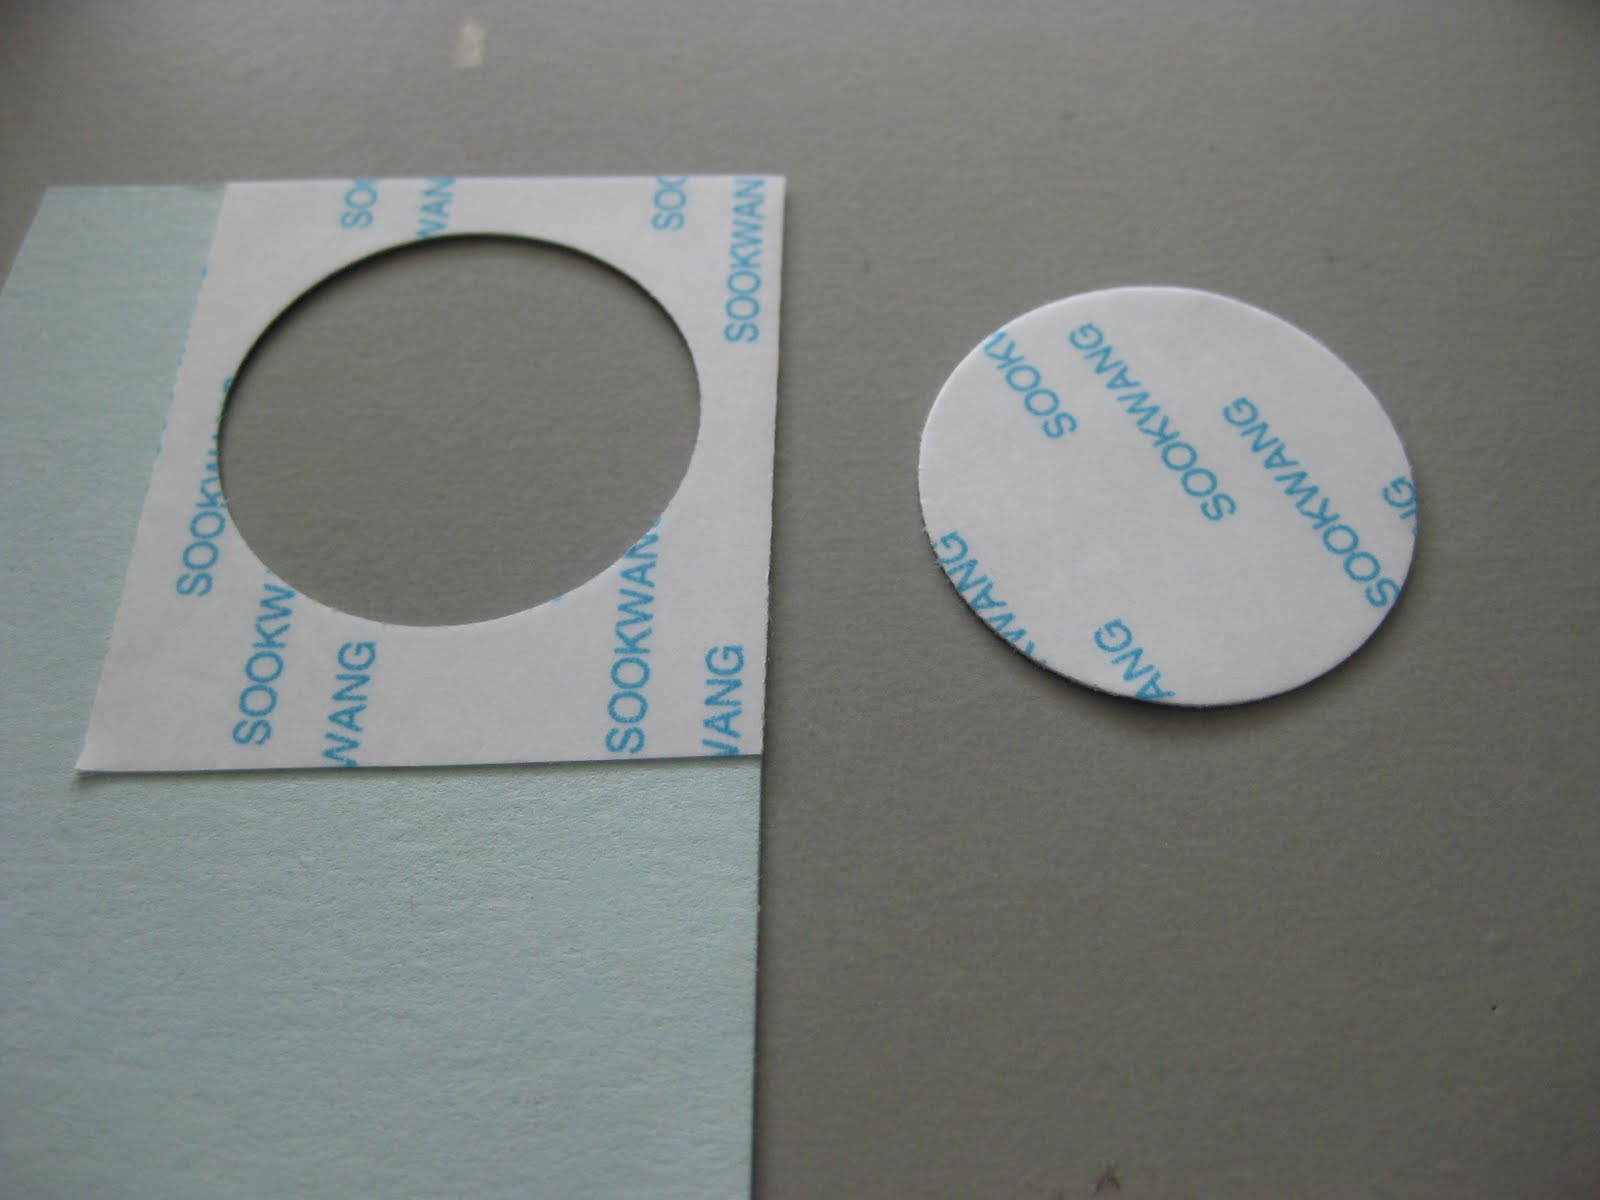
 Step 2. Punch out a circle and remove the adhesive back.
 Step 3. Attach your ribbon so that most of it is off the circle. I really love this adhesive because it is super sticky and holds great.
 Step 4. Start working your way around the outer edge of the circle by twisting and sticking the ribbon down to create small "petals".

 Step 5. When your done working the ribbon around it should look like this.
 Step 6. Punch a hole through the center of your flower using crop-a-dial and attach brad to cover the ribbon end. As an alternative you can use a glue dot and button.

Step 1. Lay a piece of 2 sided tape onto your cardstock.
 Step 2. Punch out a circle and remove the adhesive back.
 Step 3. Attach your ribbon so that most of it is off the circle. I really love this adhesive because it is super sticky and holds great.
 Step 4. Start working your way around the outer edge of the circle by twisting and sticking the ribbon down to create small "petals".
 Step 5. When your done working the ribbon around it should look like this.
 Step 6. Punch a hole through the center of your flower using crop-a-dial and attach brad to cover the ribbon end. As an alternative you can use a glue dot and button.

No comments:
Post a Comment